Copyright Notice

© Copyright 2023 Brenda Swenson retains copyrights to all images (artwork and reference photographs). All images on this site are property of Brenda Swenson and may not be used in any way for commercial, financial or personal use without written consent. Brenda Swenson retains all rights to republication (printed and digital) and anything but personal viewing of artworks. www.SWENSONsART.net
Showing posts with label Pen. Show all posts

Monday, October 23, 2017

Walnut Ink & Watercolor

Autumn brings with it a beautiful array of colors and textures. At our Farmer’s Market a
new crop of persimmons are available in a variety of shapes and colors.  I came home with a bag full and put them in a favorite dish. I loved how the contrast of colors and textures played off of each other: orange-red against blue-green. Smooth against rough.

When Daniel Smith Artists’ Materials asked if I’d like to try their Walnut Ink. I was eager to give it a try. I am particularly fond of inks with warm tones. The idea of drawing the persimmons with walnut ink was appealing. Before the bottle arrived I did a little research on their website. I thought walnut ink would fade. I was wrong. Here is what I found.

“DANIEL SMITH Walnut Ink is lightfast, non-acidic, transparent, and low staining.  It’s finely pigmented, sepia-colored, water-based ink made from walnut husks. It's great for all types of drawing styles and calligraphy, and works beautifully with a dip pen or brush. With a brush, DANIEL SMITH Walnut Ink handles like a transparent watercolor with good layering, and lifting capabilities in darker washes. The rich color resembles traditional walnut-based inks, but will not fade.” 

Step 1
Watercolor Paper is Bockingford cold press 140lb. My favorite technique for drawing is continual line contour. I keep my pen on the paper for the majority of the drawing. I am using a bamboo reed pen…Why? I enjoy line variation.
Helpful hint: Before you begin drawing soak the tip of the bamboo reed pen in 3 inches of water for 20 minutes.  The pen will have an increased ability to hold ink.


Step 2
I start by pulling fresh color into the center of my palette. I work on a dry surface and mix the colors on the paper. You’ll noticed the Walnut Ink moves…I like that. If I touch the line gently it will move a little and more if I scrub the line with my brush the more it moves.  
The persimmons are a mixture of Hansa Yellow Medium, Anthraquonoid Scarlet & Quinacridone Burnt Orange. The Leaf and stems are Quinacridone Gold & French Ultramarine.


Step 3
The plate is painted with Cobalt Teal Blue. I intentionally disrupted the details on the plate with my brush. I want the lines to defuse. I don’t want the lines to be in sharp focus especially since the majority of the plate will be effected by shadows from the persimmons.


Step 4
Shadows are my favorite subject! The presence of light defines form and gives life to a subject. I begin my making two puddles of paint on my palette: 1. Quinacridone Burnt Orange & Quinacridone Rose 2. Imperial Purple. I start by painting the form shadows on the persimmons with Quinacridone Burnt Orange & Quinacridone Rose and quickly move into the cast shadows on the plate with Imperial Purple. I want a soft transition between the objects and the colors.


Step 5
The final stage I use Imperial Purple in the background. Before the passage has lost its shine I touch a small amount of Phthalo Turquoise into the area. Final touches are added to the foliage area.


My Daniel Smith dot card has a white X on the colors I used for this piece. All the materials used in this demonstration are listed below. 

Ink: Walnut Ink (new bottle same ink)
Watercolor Paper: Bockingford 140lb cold press


Happy Painting!
Brenda


Sunday, June 4, 2017

Continual Line Contour


I've been using "continual line contour" drawing for so long I've forgotten when I learned how. I can tell you it has changed the way I see, draw and paint. I've learned more about observing edges, measuring, overlapping and page placement than any other approach. 
   
In my workshops (sketching, illustrated journal or plein air workshop) I start by demonstrating and teaching this technique. At first students might feel hesitant. But by the end of the workshop I have won them over.  

I keep a collection of props on hand and I ask students to bring props to the workshop too. The more variety the better: jars, kettles, paint tubes, brushes, mugs, wooden and metal tools, artificial flowers, vegetables. 
During the workshop I use a timer so the drawings don't become too involved or precious.  It’s funny how the mind acts when you use a timer…absolute and complete focus! We start by drawing: 1 object in 3 minutes, 2 objects in 6 minutes, 3 objects in 10 minutes. All drawing is done from life (no photos). Once we get comfortable with drawing we begin painting.

Here's a workshop demo:

During the drawing keep your pen on the paper as long as possible. Yes, I said PEN! This exercise will teach you to slow down, look longer and be more certain of shapes, size and edges. There will be a certain amount of distortion to the drawing but I consider this part of the charm.  Continual Line Contour is a good exercise no matter how long you've been drawing. 

Here's a short video I made showing, "Continual Line Contour". I usually work from life but in the video I use a photo so my view would be the same as the viewers. If the video doesn't play click on the link: https://youtu.be/eIVjtb5yQ9Q


"Art like life, is knowing where to draw the line".  Happy Sketching!
Brenda


Thursday, November 17, 2016

The Perfect Sketch Bag


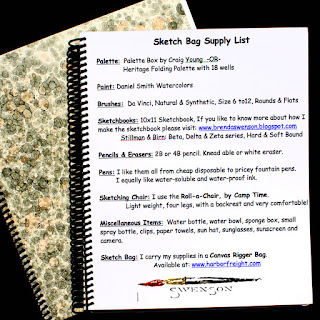
I'm an organized person by nature and the idea of having everything I need in an organized bag delights me to no end. I keep my sketch bag packed and when I get a chance to sketch I grab the bag and go. No need to worry about forgotten items. 

Over the years I have refined the set-up and it works for me. I use a “Rigger Canvas Bag” I found at a tool store called Harbor Freight (they no longer sell the bag but I've seen similar bags at Home Depot and garden shops). I've made a few alterations to the original bag.  I took out some stitching to open up the pockets on the sides, put cardboard inside on the bottom for added support and a shoulder strap. Now my pens, brushes, palette, sketchbooks…fit snuggly. You just can’t beat it! 

I have been carrying a sketch bag around for so long friends have nicknamed it the “Brenda Bag”. I use my Sketch Bag when I travel across the country and overseas. I simply take everything out, roll up the bag and put it in my carry on luggage. Yes, I carry my palette on the plane. I leave it open for a couple days so the paint will harden and put in a plastic bag. 

The sketch bag has become like a old friend. We have traveled across the U.S. countless times…to Prague, Germany, France, Tuscany…by car plane, train…

If you wish to learn more about my larger 10x11 sketchbook, read the "Perfect Sketchbook".

Would you like to know what I keep in the bag? Here's my Youtube video. Click on my Sketch Bag to view the video.

If you have a problem viewing the Youtube video paste this link in your browser. https://youtu.be/iKsme0wedDk 

Happy Sketching!   
Brenda


Monday, May 9, 2016

Fear of Failure

It's easy to fall into a creative rut. It happens when you do the same thing over and over, and over, and over…  Any form of repetition (subject matter, technique, color…) can be the kiss of death to creativity. If you're worried about painting a “winner” every time you’ll quit If you quit stretching you’ll quit growing. Life is too short not to get a few stretch marks! 

If you want to grow it means you have to take a risk. The risk can be large or small but without the risk there is no challenge, without a challenge you become bored, and your work lacks excitement. Before too long you’ll lose interest in your own work because….YOU ARE BORED! If you find yourself in a rut, GET OUT! The fastest way to pull yourself out of a rut is shake things up! This week do something that  #!*!#+ scares you. Do it for you. Find out what you're capable of. Push the limits of your ability. Did you know adrenaline heightens your senses?

Does working through fear come easy for me…nope! I know more about fear than I’d like to admit. Unfortunately, I let fear rob me of my life for too many years…it paralyzed me! It robbed me of my potential personally and creatively. It’s okay to be afraid but don’t let the fear control you…DO IT ANYWAY! 

Try something this week that takes you out of your comfort zone. Here a few suggestions: 
Drawing Tools: pencil, bamboo pen, soluble ink, waterproof ink, markers
Brushes:  Flat, LARGE round
Technique: watercolor, collage, pen & ink
Surfaces: tinted paper, Japanese paper, slick paper, rough paper
Size: Do something BIG, miniature
Subject: landscape, nudes, old trucks, portraits, street scenes
View: from above (birds view), from below (worms view)
Atmosphere: sunny, foggy, rainy
Lighting: soft or sharp, warm or cool
Plein Air: Working outdoors


Recently I challenged myself. I wanted to see if I could do a pen and ink with watercolor on a larger scale, 22x30. I knew my ink lines had to be bigger. How was I going to do it? I started looking around and decided my largest Bamboo pens were perfect. I liked the width and slight irregularity of the lines would add to the sketchy feeling. No pre-drawing with pencil. It was wonderfully freeing to let the ink lines wiggle, blob and splatter ink. I wasn't out to create perfection I was having fun...and it wasn't so scary after all. 


used Noodler’s Ink, Polar Brown (waterproof), Bockingford watercolor paper 22x30, 140lbs cold press and Daniel Smith Watercolor.

 I wanted the finished piece to feel "sketchy". I resisted the temptation to refine things too much.  I wanted the look of a large sketch. Which brings up a good question...what exactly is a sketch? Is it the size? The approach? The materials used? I don't have a good answer. I love to play and push the boundaries of ink and watercolor and that's all that matters to me. I'll let others worry about definitions and I'll keep sketching and painting.

Happy Painting!
Brenda


Man of Volterra, Italy

Monday, October 5, 2015

What Are You Waiting For?


Have you ever wanted something so bad it was all you could think about? Me to! Ever since third grade I wanted to be an artist. The older I got the more complicated life became. My hopes and dreams became something I would obtain later. What was I waiting for?  I was waiting for my children to be older, to have more time, more energy, more money, to have my house work finished, my errands done, to be encouraged... The truth is I was better at finding reasons why I wasn't living my dream then putting the energy into making it happen. So what was the problem? Simply put…ME! It’s easier to make excuses then taking responsibility and making it happen. 

The honest-to-goodness truth is I had to change my thinking. I didn’t value my time. I’m not alone here…its common thinking among women to see what we do for others as more valuable than feeding ourselves. What we fail to see is creativity is the core of who we are.

Every day has 24 hours. We’re never going to have EXTRA time. It doesn't exist! Time will always run out at the end of the day. Family will need us, friends will come calling, laundry will need folding, dishes washed…Trust me these things will be their tomorrow.  Begin today no matter how small a step.

We make the choices of how we spend our time…PERIOD. What are you waiting for? Hope deferred makes the heart sick, but a longing fulfilled is a tree of life.  Proverb 13:12

These sketches show how everyday tasks can be an opportunity to draw. I have countless pages of daily chores, dishes in the sink, kitchen counter with its clutter, lunch, furniture in my home… Start making it happen.

Happy Sketching!

Brenda

Tuesday, March 19, 2013

Putting Zeta Paper to the Test


Recently the Stillman & Birn Sketchbook Company sent me samples of their new Zeta Series paper. When the paper arrived the first thing I noticed was the papers surface. It is similar to Hot Press watercolor paper. To the touch the surface is smooth, bright white and the weight is 180 lb. The Zeta Series has both internal and surface sizing, it is acid-free, lignin-free and chloride-free.  

Click on image to see larger
Step #1 Pen drawing. I used the technique of Contour Drawing with a waterproof pen.

Step #2 Watercolor painting. I began by blocking in the larger areas with watercolor.

Step #3 Here is where the paper is put to the test. I like to build up rich color in glazes. The paper held up great
.Where I wanted to lift color for highlights the color came up easily with a soft brush and clean water.

Pen & Ink
I thoroughly enjoyed how pens move on the surface…they glide! I also noticed that some inks take a little longer to dry than others. This has to do with the papers sizing. This isn't
a problem, just an important fact. Quite often I select pens/ink because they move when wet, but for this demonstration I wanted the line work to stay put. The Pitt Pens by Faber-Castell dried instantly, and this is the pen I used (medium tip). Noodler’s Ink in Polar Brown and Lexington Gray dried instantly, too.

Watercolor
I am predominately a watercolor artist so I was curious to see how the paper would hold up with watercolor. The paper was a joy to paint on! It was easy to build up layers, soften edges, and lift color. I found it easier to work on than Hot Press watercolor paper. All my colors remained clear and vibrant and the paper didn't warp.

Final Thoughts
I take all my artwork seriously whether I'm sketching or painting. The Stillman & Birn Company takes their paper seriously, too. I can’t wait for the new sketchbooks made with Zeta paper to arrive in stores. I will definitely be using it!

Happy Sketching! 

Brenda